
Google Workspace™ Add-On
Setup Instructions
Step 1
Visit the Linguisity Google Workspace™ Add-On page at the Google Workspace™ Marketplace.
Step 2
Next click the 'Install' button.

Step 3
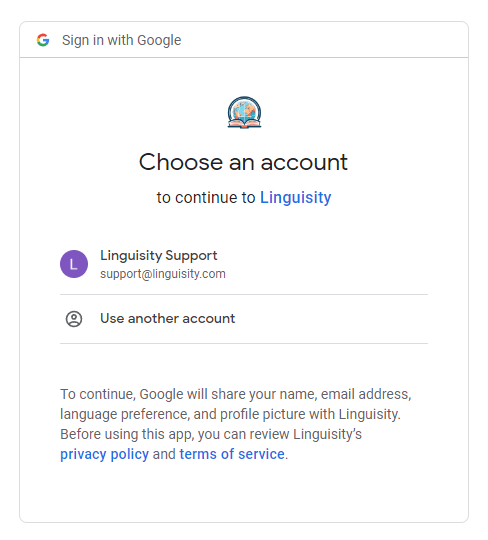
A pop-up will appear, prompting you to log in with your Google Account. Choose the account or log in with the account that you wish to use for installing the Linguisity Google Workspace™ Add-On.
Step 4
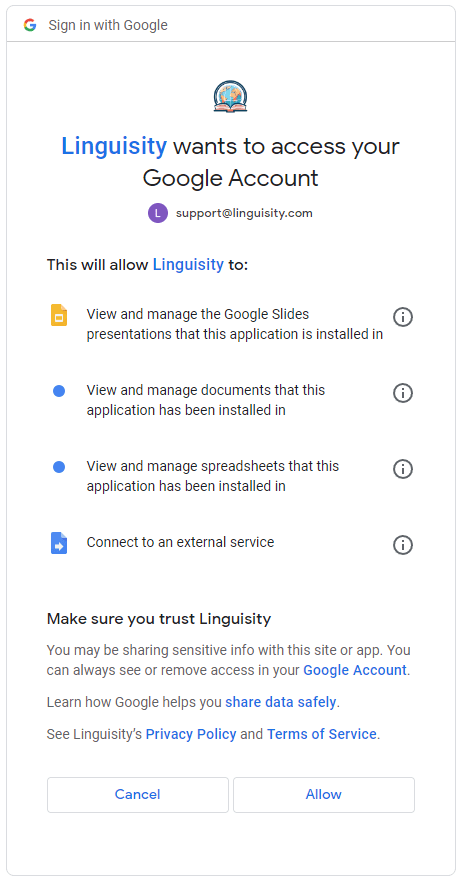
You will now be prompted to grant permissions to the Linguisity Google Workspace™ Add-On. This will enable the Add-On to function seamlessly with Docs, Sheets, and Slides, as well as establish the necessary connections to the Linguisity service. Once you are ready, click on 'Allow'.
Step 5
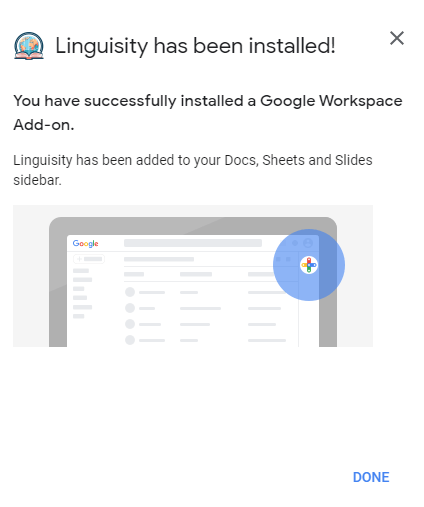
You will now receive a notification indicating that the Linguisity Add-On has been successfully installed. Please click on the 'DONE' button to proceed.
Step 6
Open a document in Google Docs, slide in Google Slides, or open a spreadsheet in Google Sheets.
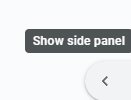
If the side panel on the right-hand side of the screen is not visible, there should be a left-pointing arrow button at the bottom right-hand corner of the screen.
Click this arrow button to display the side panel.
Step 7
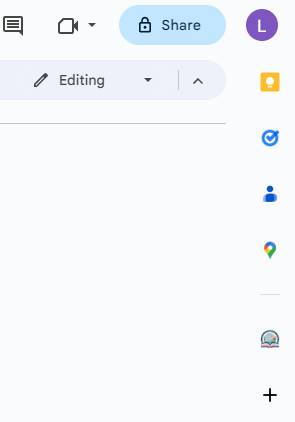
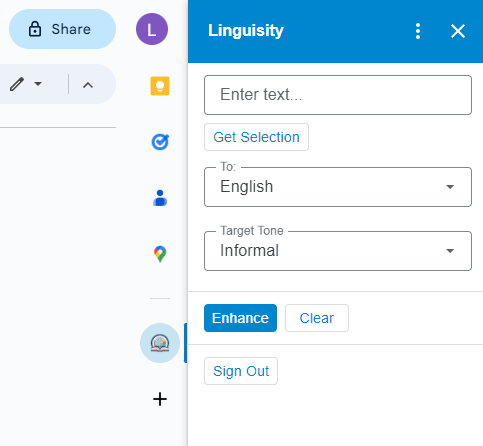
You should now see the side panel on the right-hand side of the screen.
The Linguisity icon should be visible if the Add-On was installed correctly. Click the Linguisity icon to open the Add-On.
Step 8
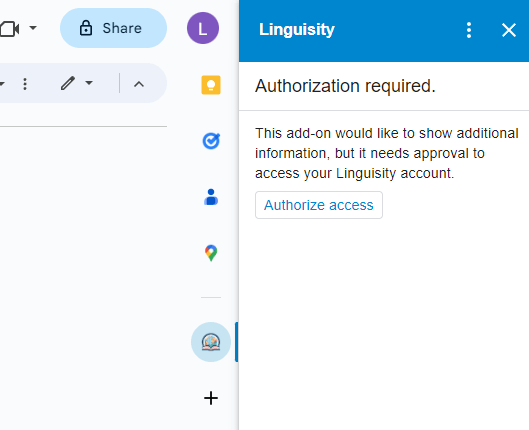
As this is your initial use of the Add-On, you will be prompted to authorize your account.
Please click the 'Authorize Access' button.
Step 9
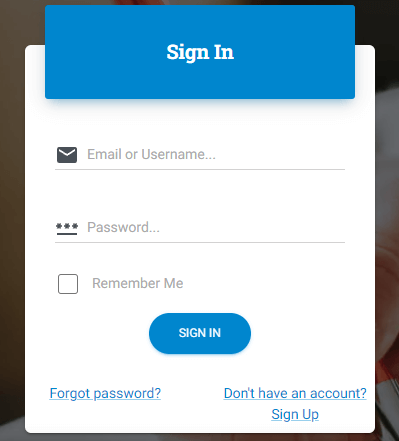
A new pop-up will appear, where you can sign in using your Linguisity account credentials. If you do not have an account, you can create one.
Once you have entered your email address or username and password, please click the SIGN IN button.
Step 10
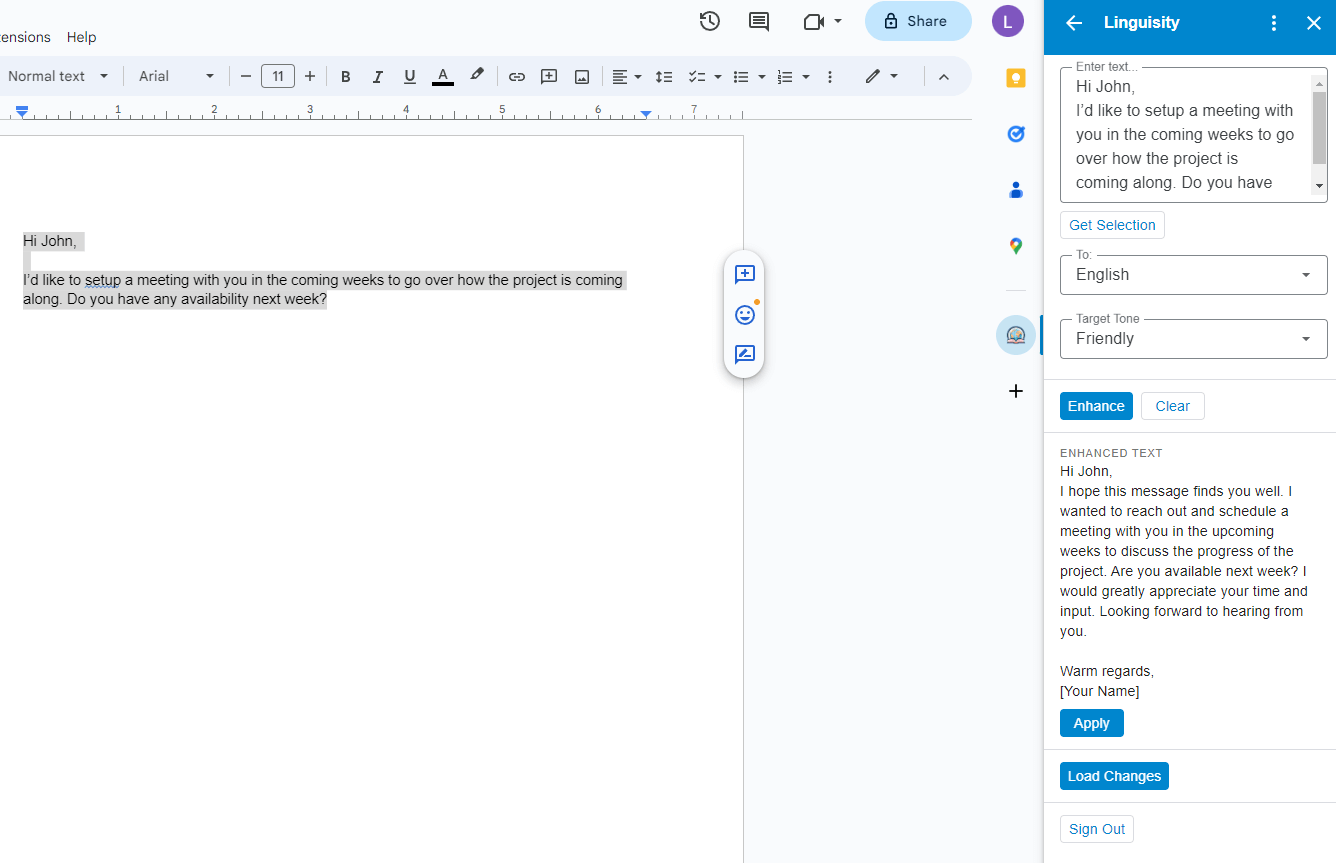
After successfully logging in, you will now be able to access the main Linguisity Add-On interface.
You can either start typing new text into the input box or highlight some text from your document, presentation, or spreadsheet and click the 'Get Selection' button.
Select a target language and tone, and then click 'Enhance'.
Step 11
Once the enhancement is completed, you will be able to view the result in the Enhanced Text section of the Add-On.
If you are satisfied with the outcome, click the Apply button. This action will replace the currently highlighted text in the document with the enhanced version.
If there is no text currently highlighted, the enhanced text will be inserted at the current cursor location in the Document, Sheet, or Slide.
(Optional Step 12)
To view the details regarding the modifications made from the original text to the enhanced version, click on the 'Load Changes' button.
Once the loading process is complete, it will provide an overview of the significant improvements made to the text.
