Linguisity for iOS
Setup Instructions
Step 1
Visit the Linguisity App Store page with your iOS device.
Step 2
Proceed by clicking the 'Download' button.

Step 3
Please wait for the Linguisity app to finish installing, and then click the 'Open' button.

Step 4
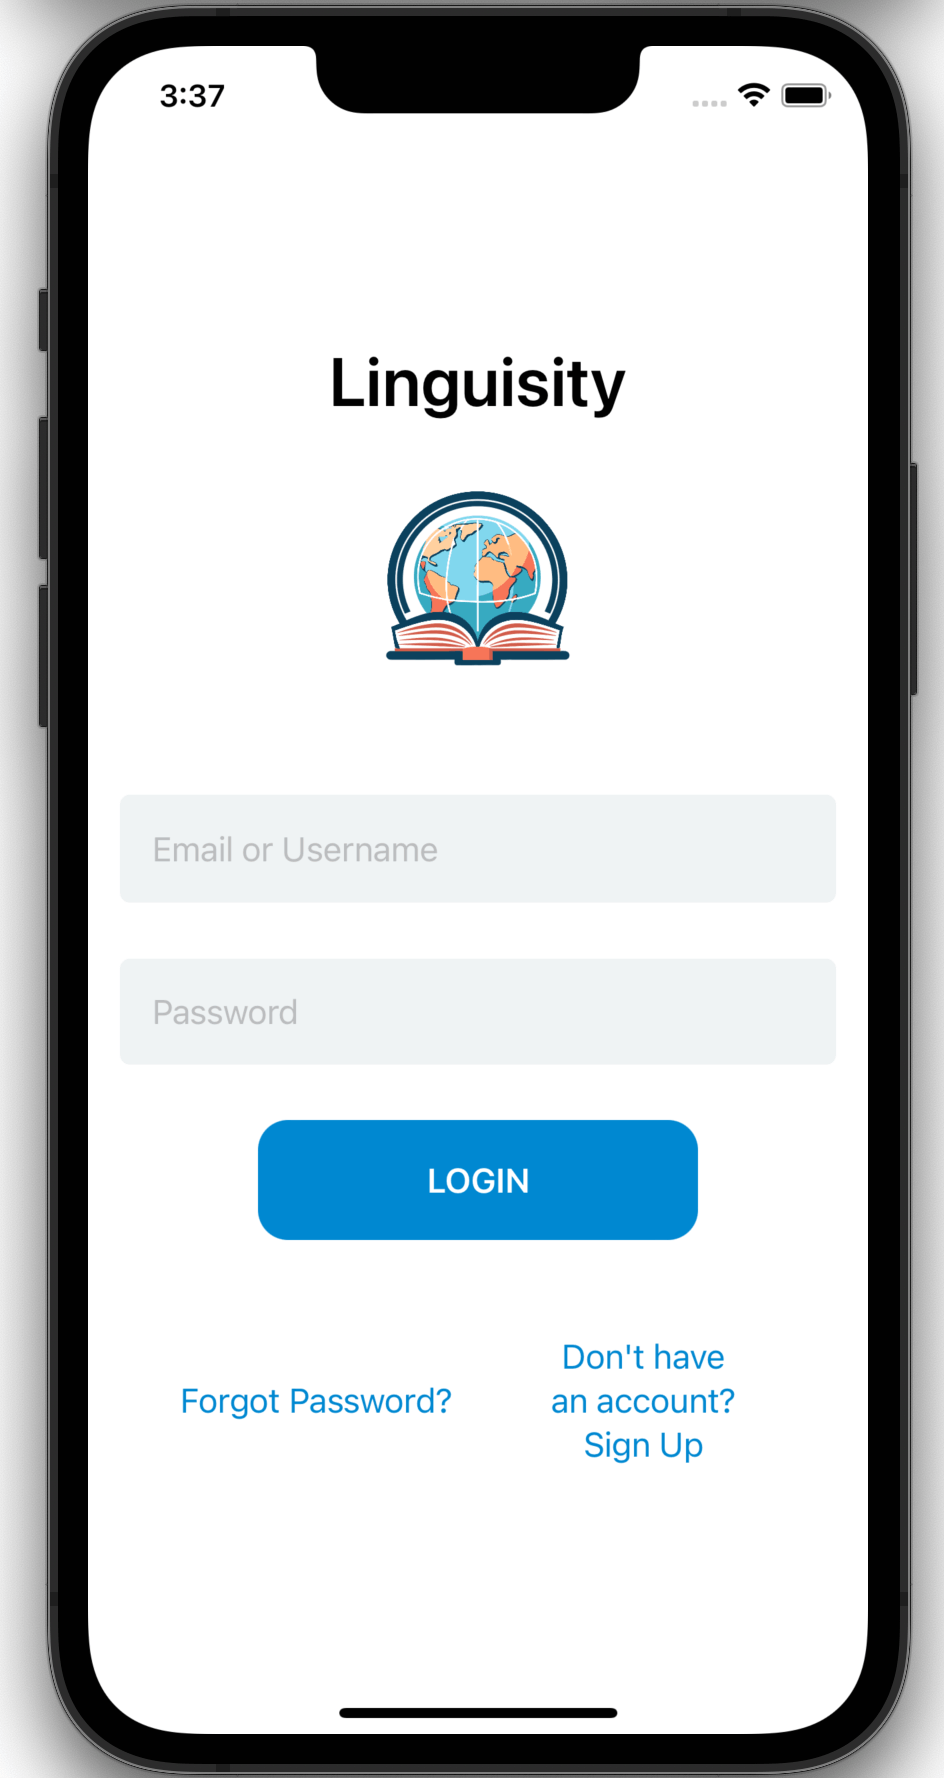
After launching the Linguisity app, you will be prompted to either sign in with your existing account or to create a new one.
Step 5
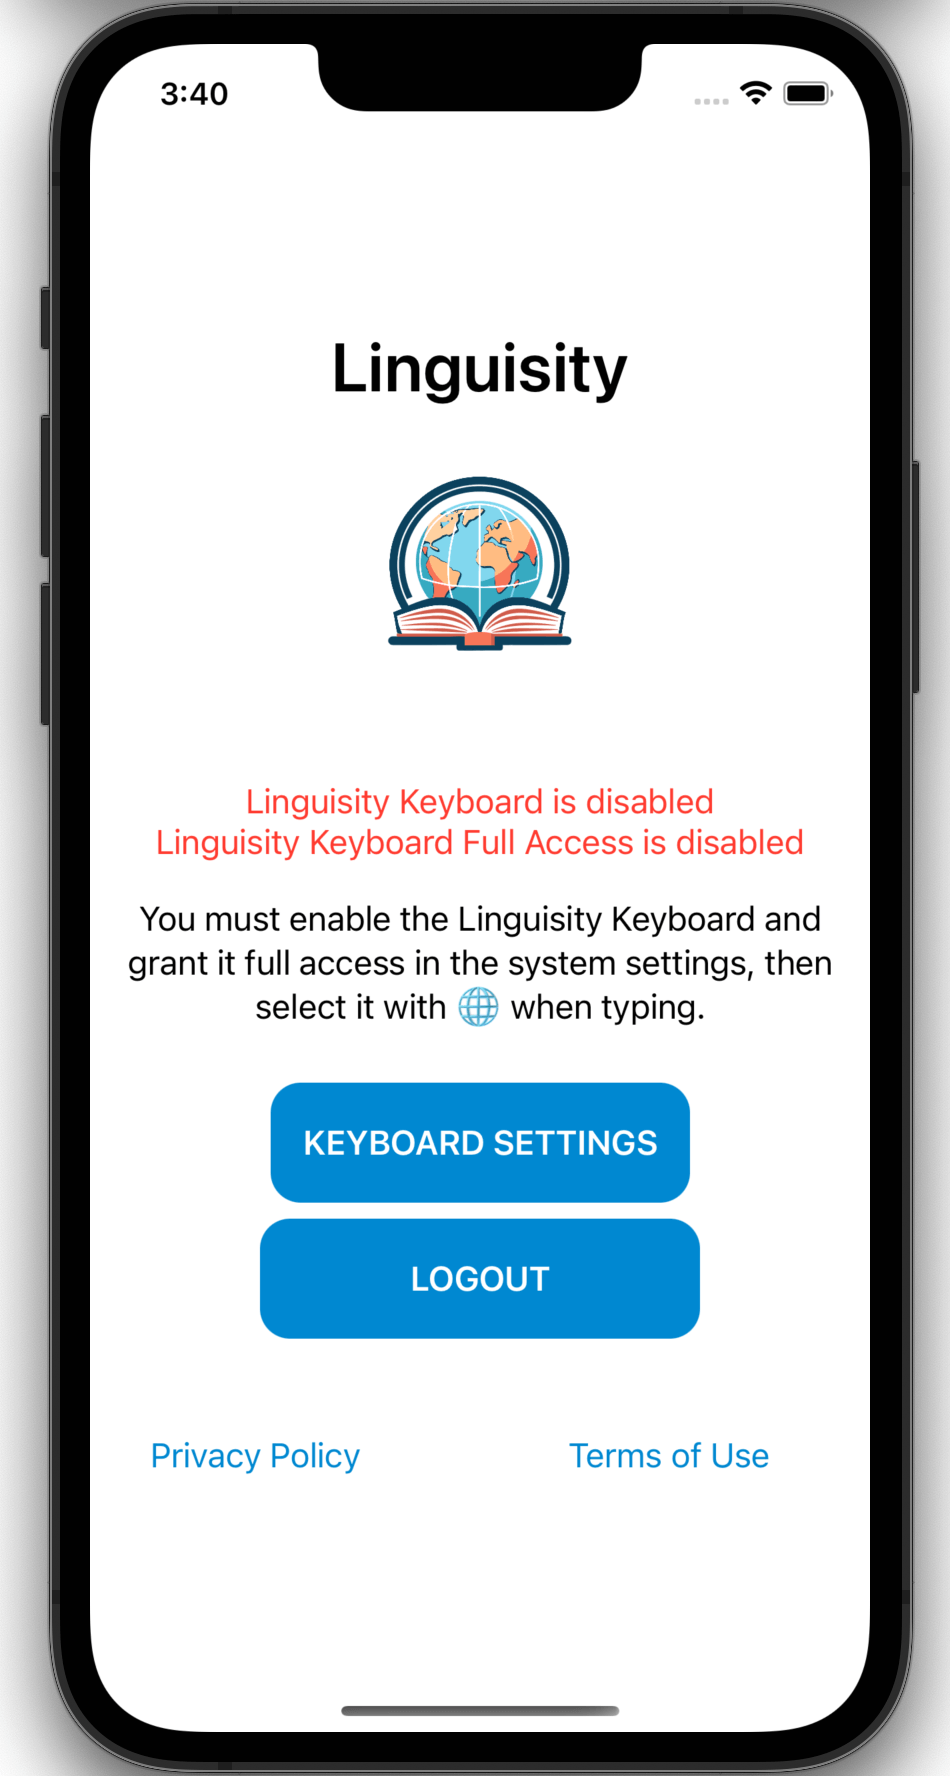
Upon launching the Linguisity app for the first time, you will notice that the Linguisity Keyboard is disabled and its full access is also disabled, both of which are indicated in red.
To ensure proper functionality of the app, it is necessary to enable these features. Simply click on the Keyboard Settings button.
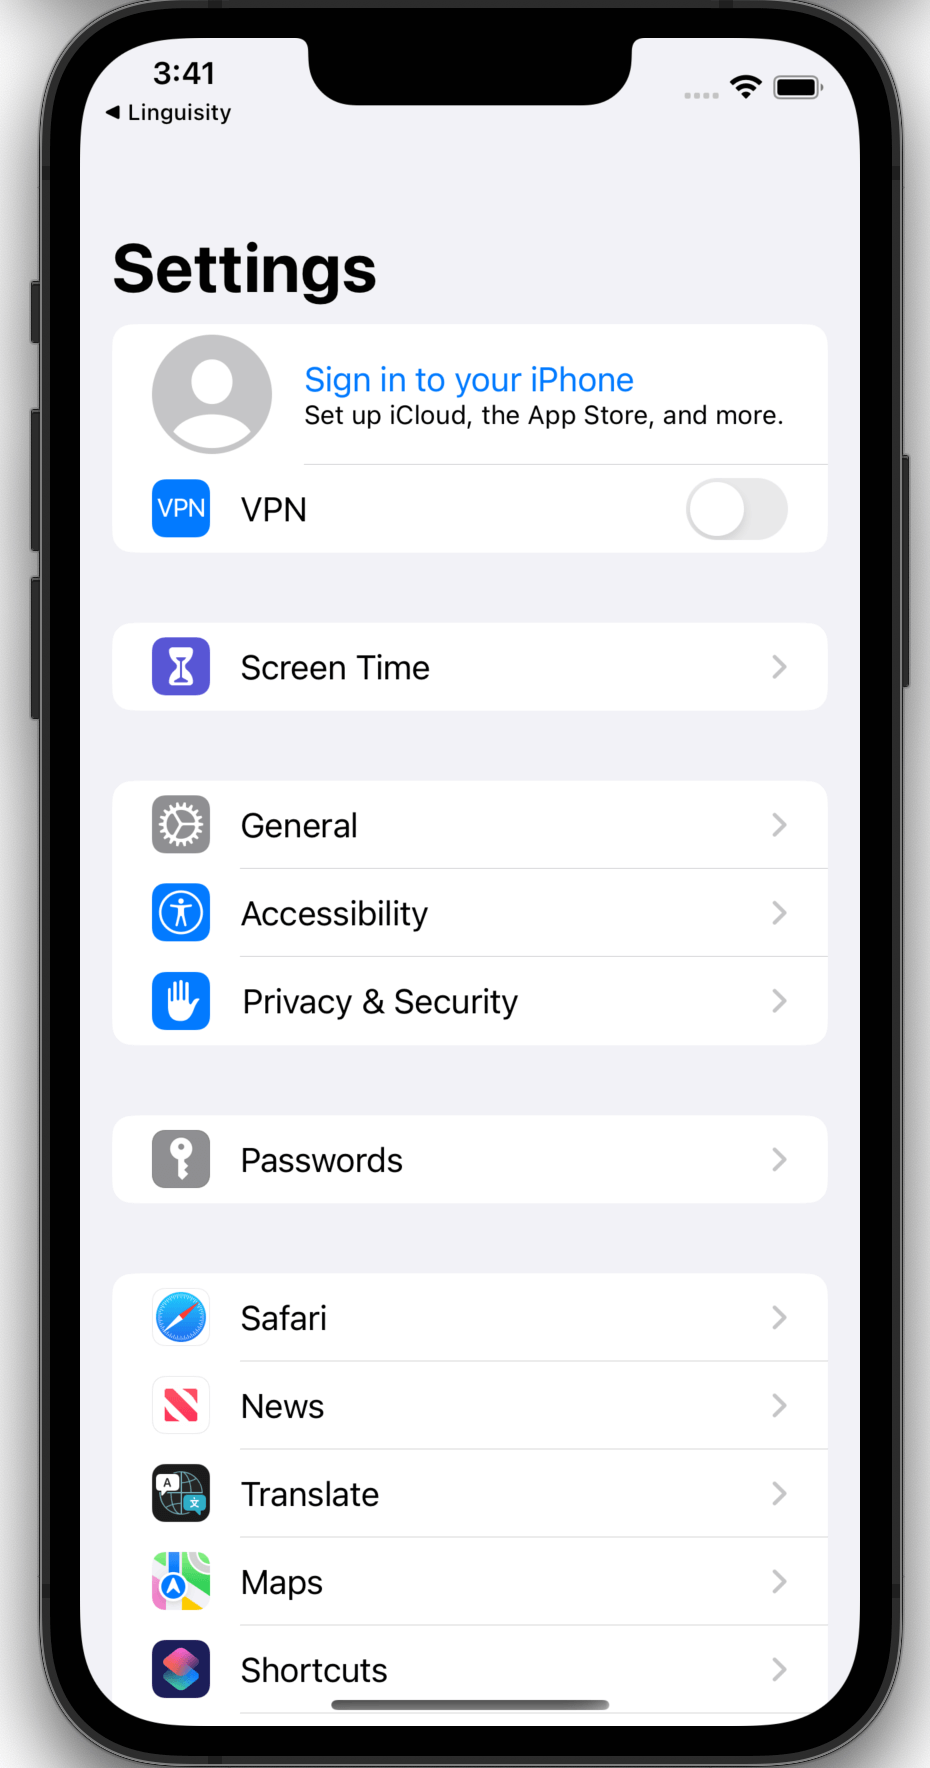
Step 6
On the Settings screen, click the General button.
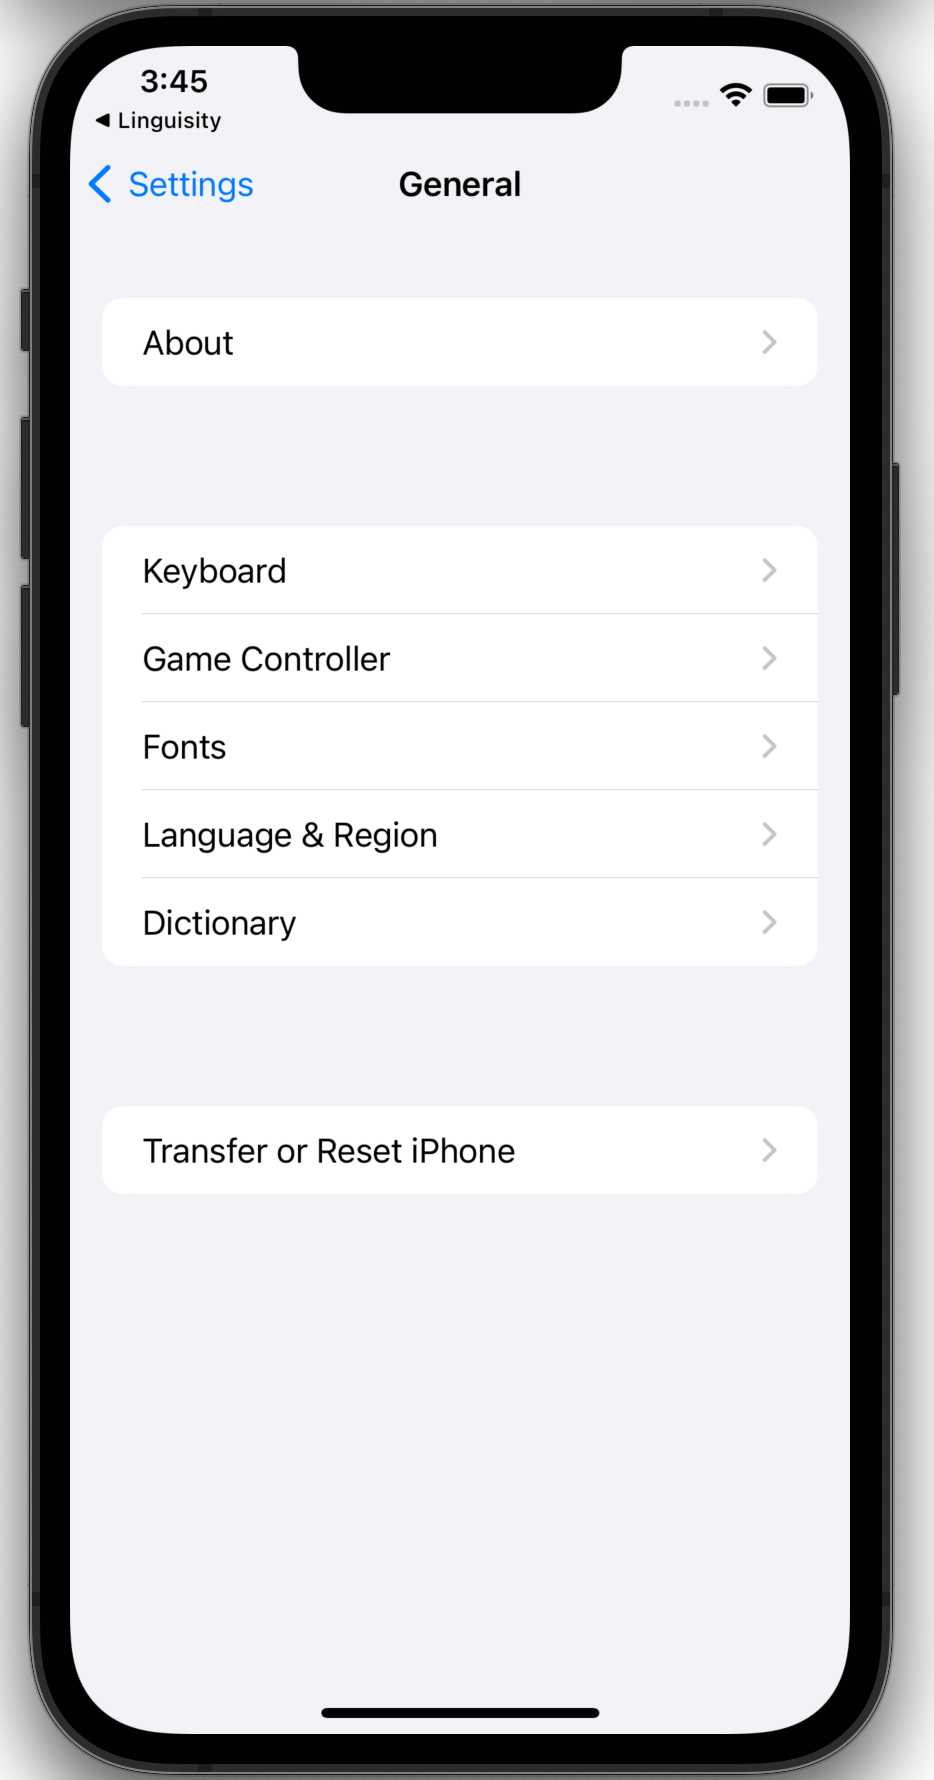
Step 7
On the General Settings screen click the Keyboard button.
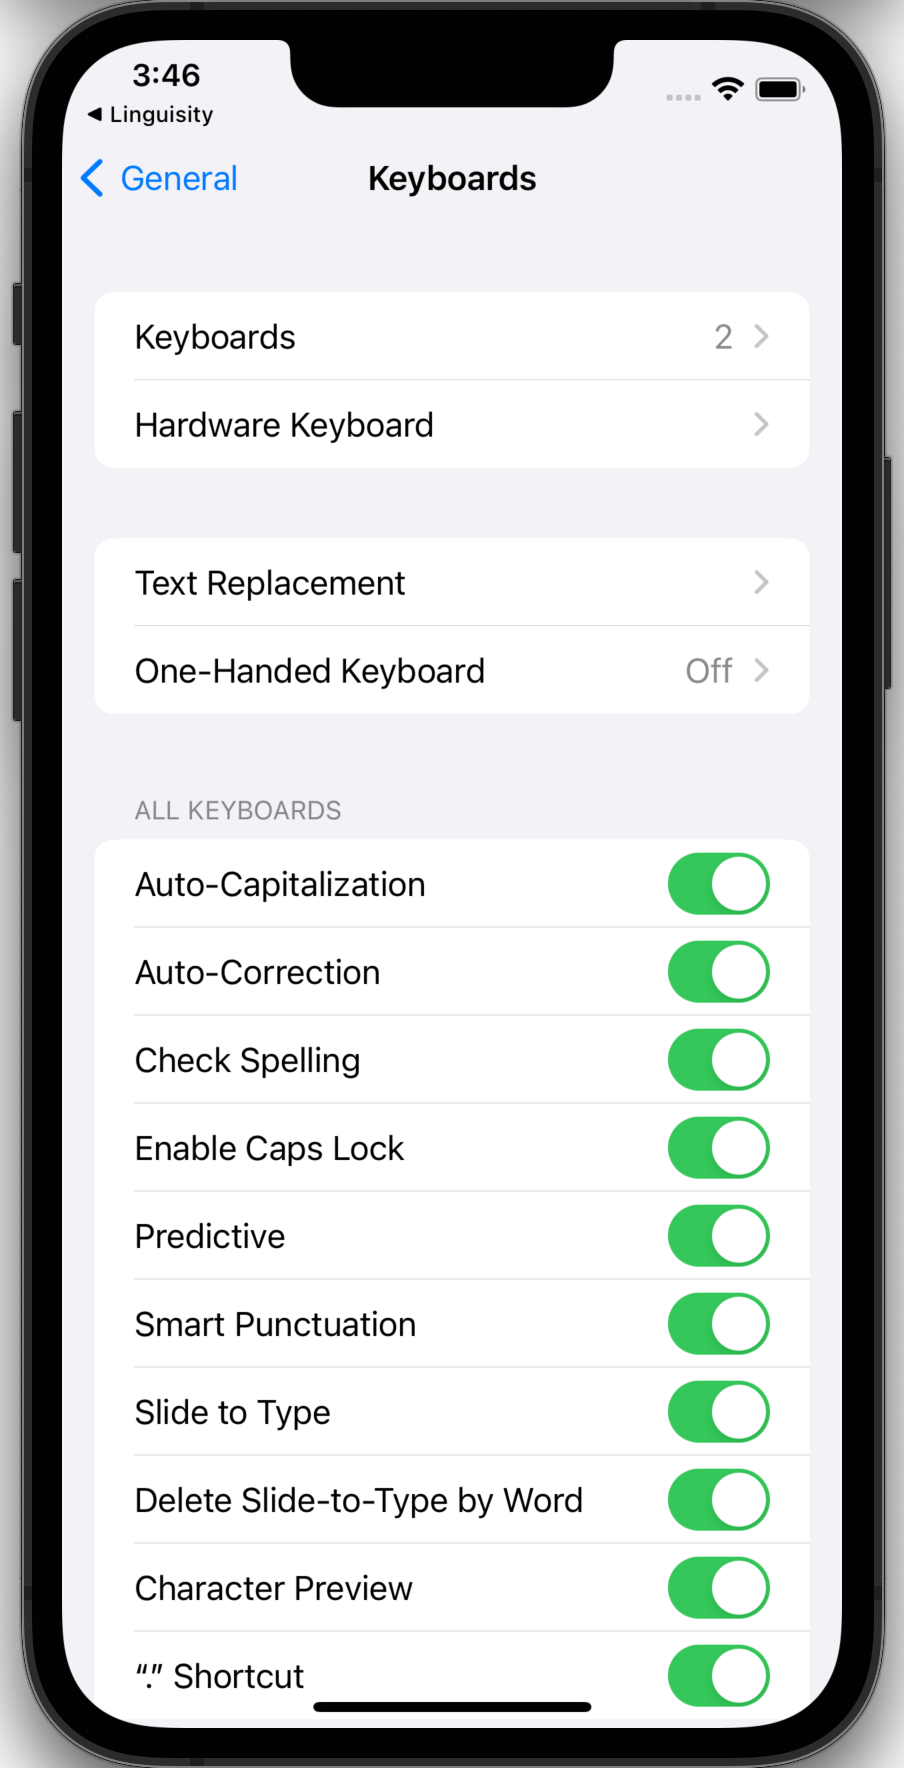
Step 8
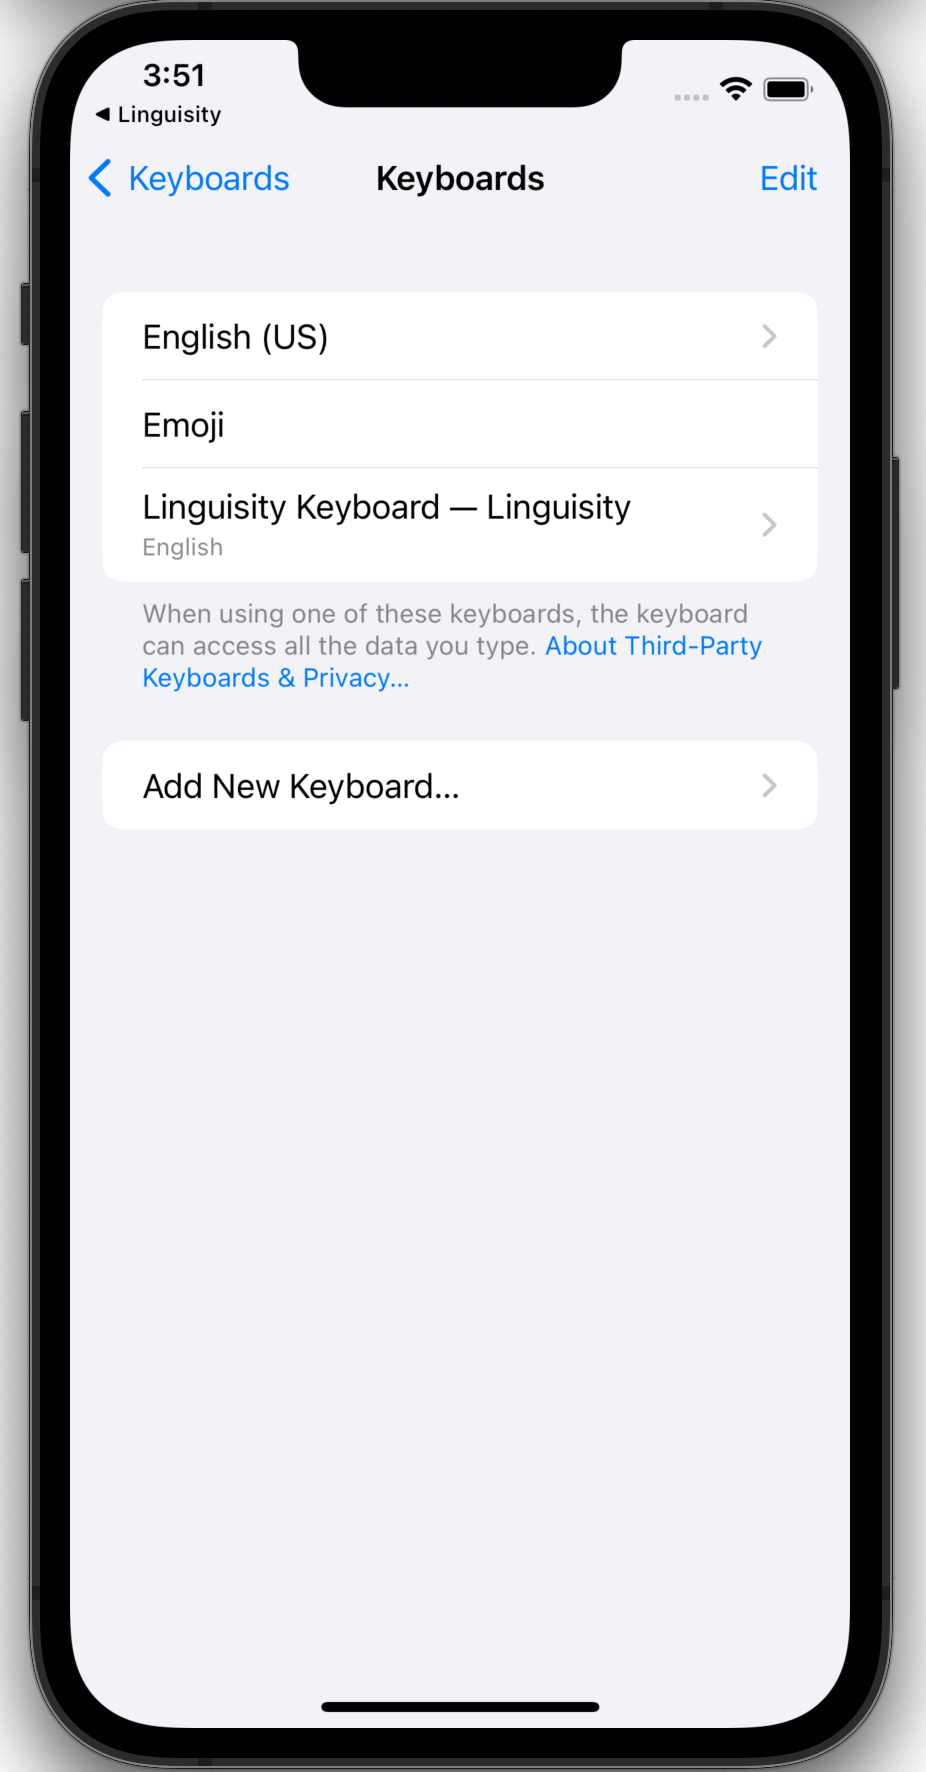
On the Keyboard Settings screen, click the Keyboards button.
Step 9
On the Keyboards Settings screen, click the Add New Keyboard button.

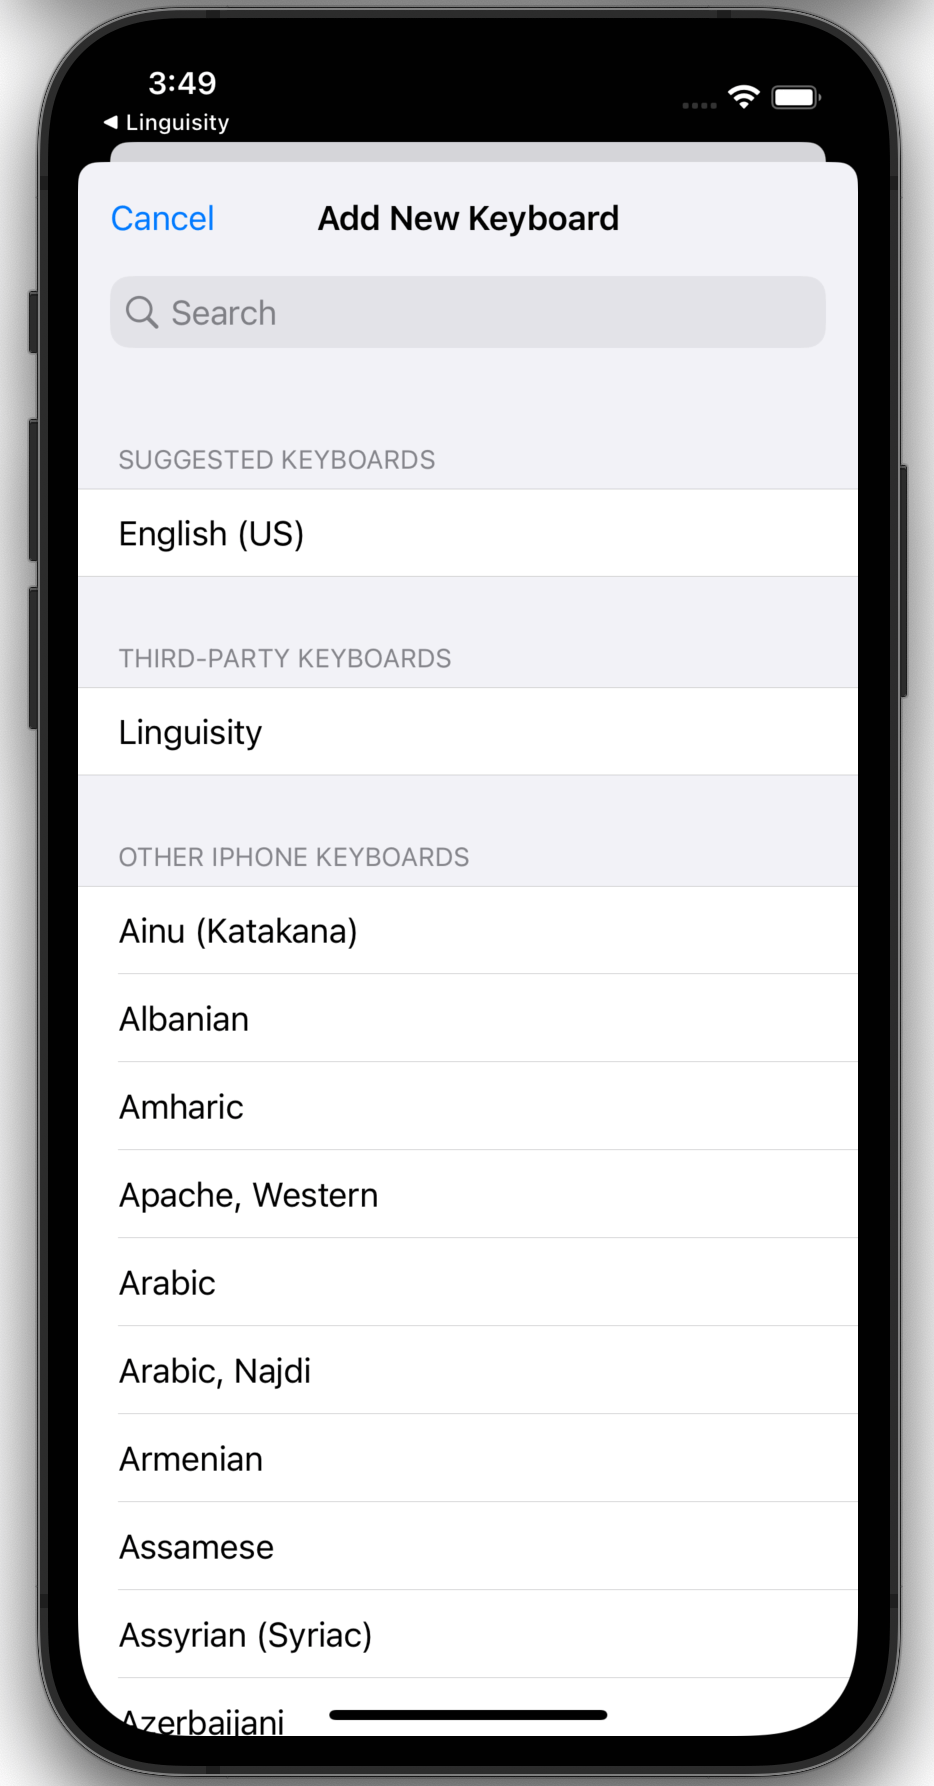
Step 10
On the Add New Keyboard screen, under the Third Party Keyboards, select the Linguisity option.
Step 11
Back on the Keyboards Settings screen, click on the new Linguisity Keyboard option.
Step 12
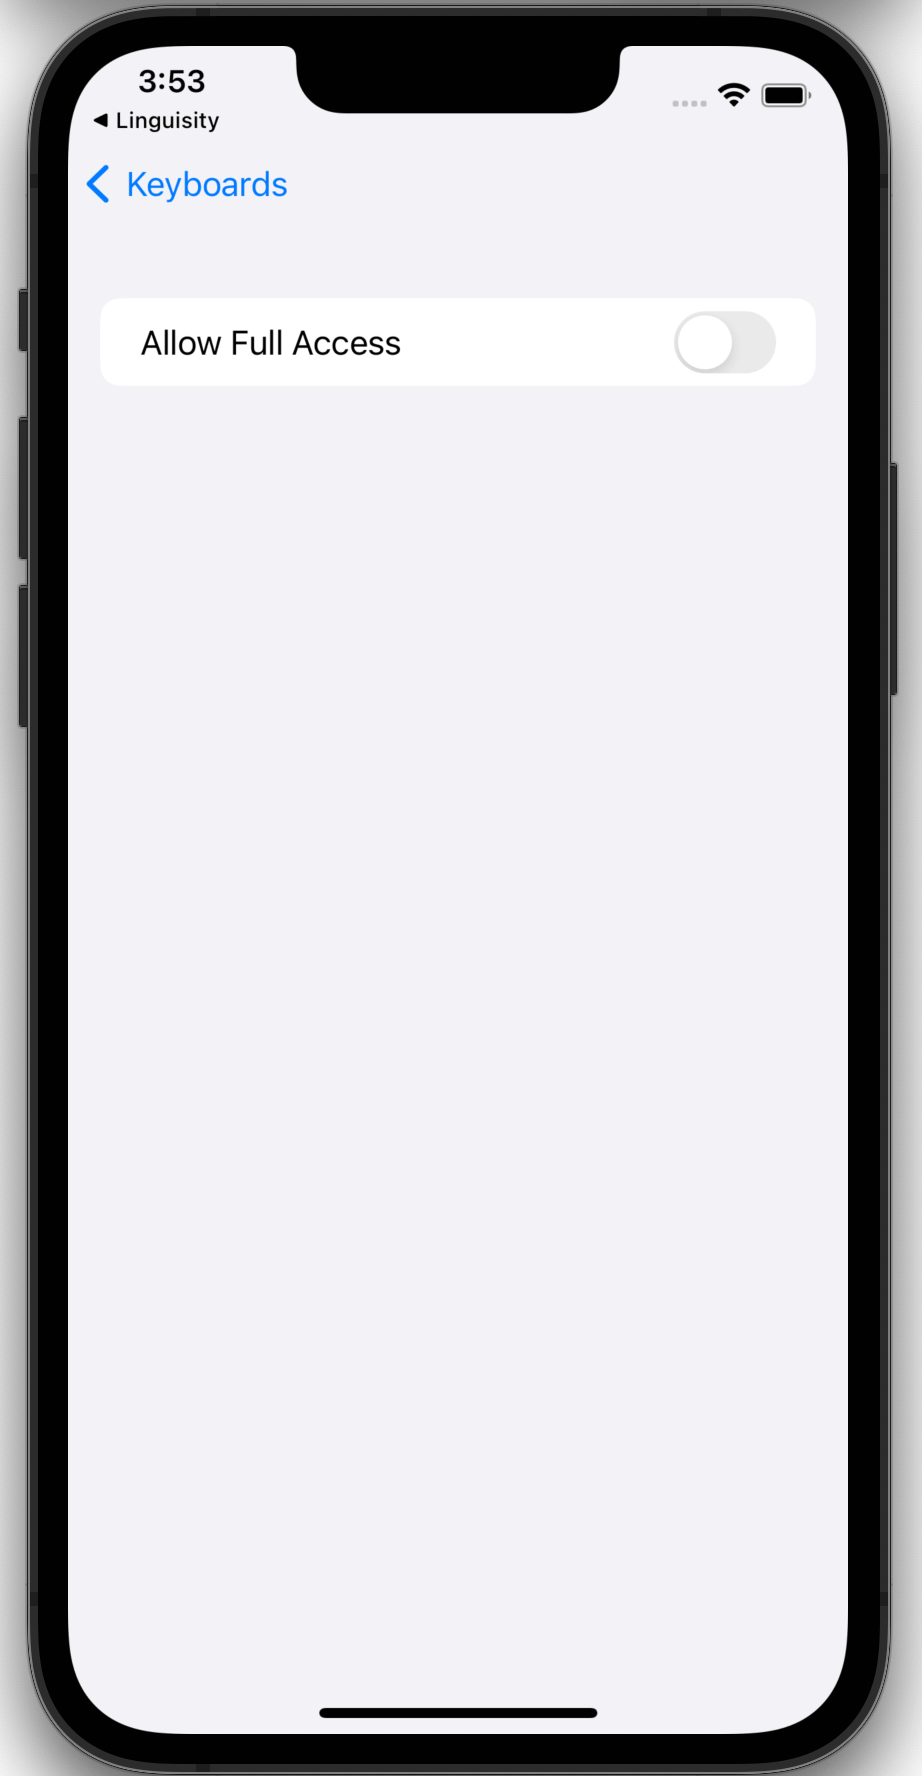
Enable the 'Allow Full Access' toggle.
Step 13
To ensure proper functioning of Linguisity, it is necessary to grant Full Access. This allows the app to transmit the keyboard input text to the remote AI models for enhancement and correction.
Once you have allowed this, click the Linguisity link located at the top left corner to return to the Linguisity app.

Step 14
You should now notice that the Linguisity Keyboard is enabled and that it has been granted the necessary full access permission. These indications are displayed in green.

Step 15
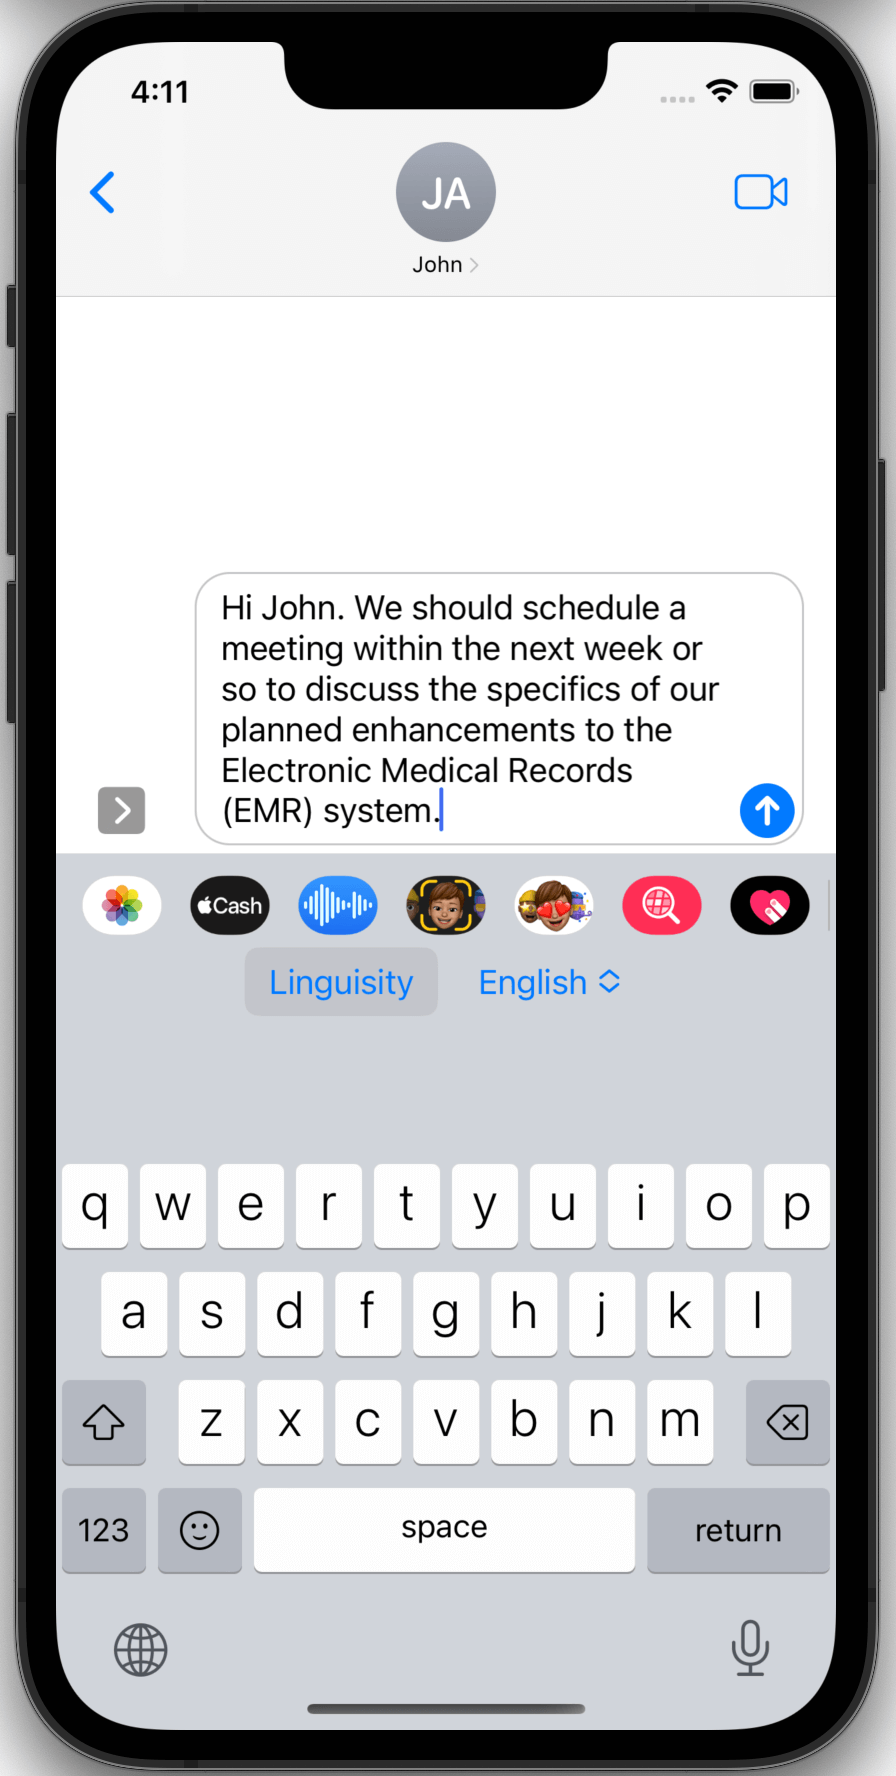
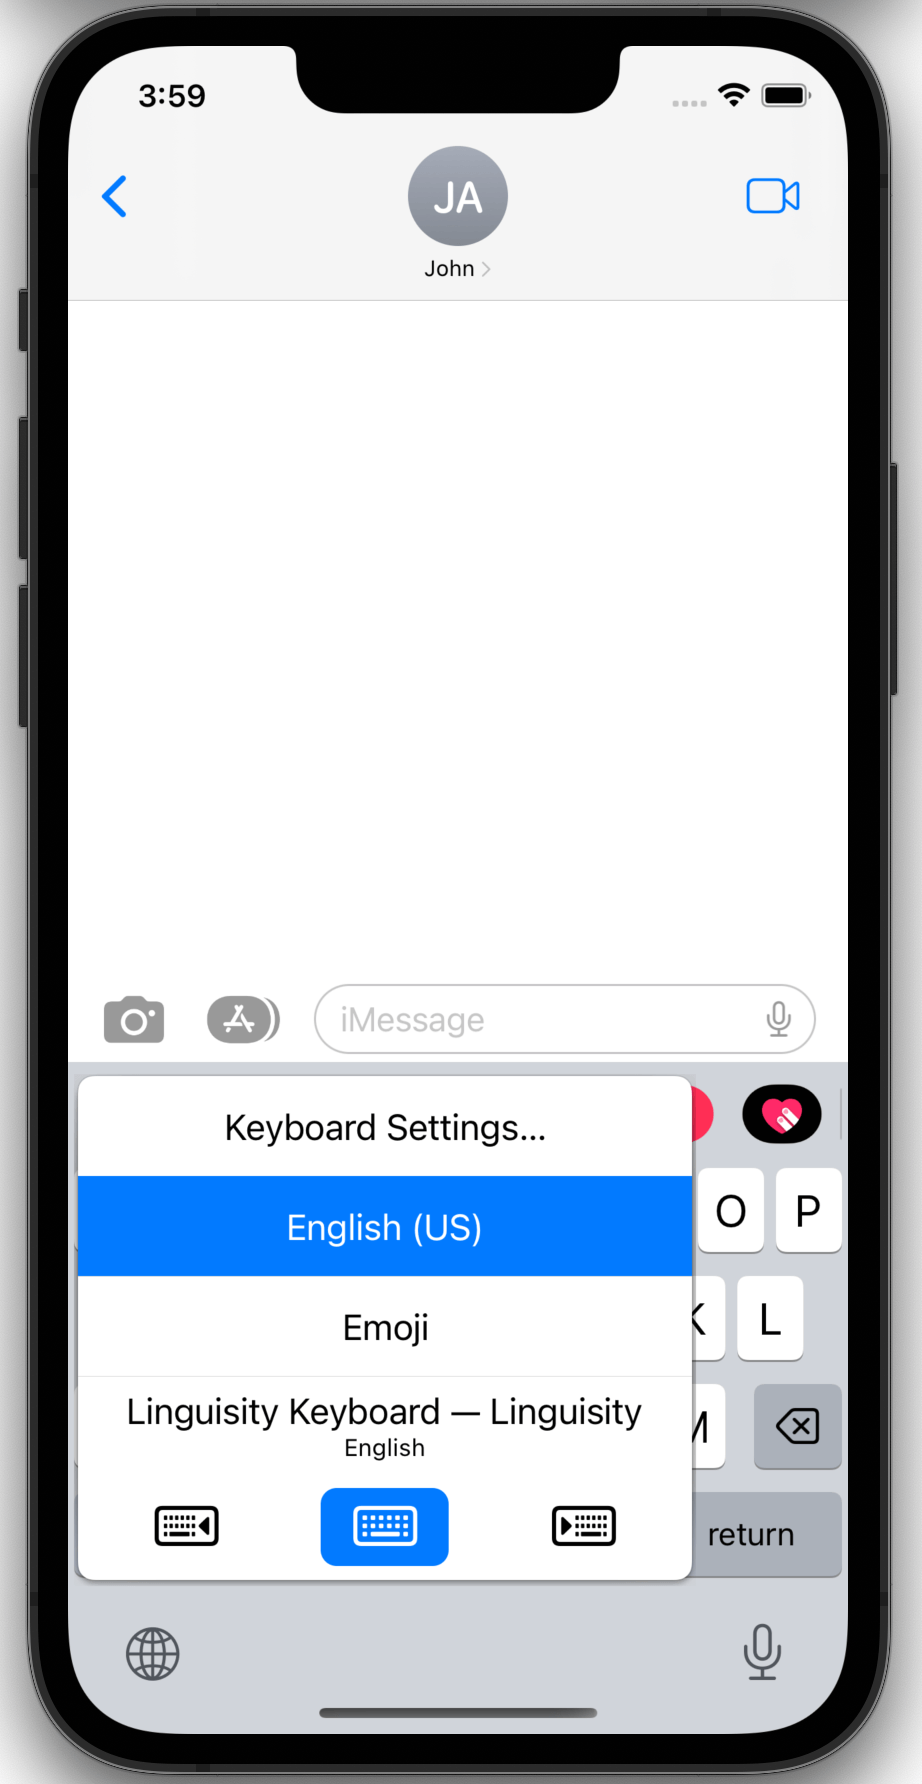
Now, open any application that allows you to enter text. Click on an input box to open the keyboard. At the bottom left of the keyboard, click on the keyboard selection icon 🌐 and choose the Linguisity keyboard.
Step 16
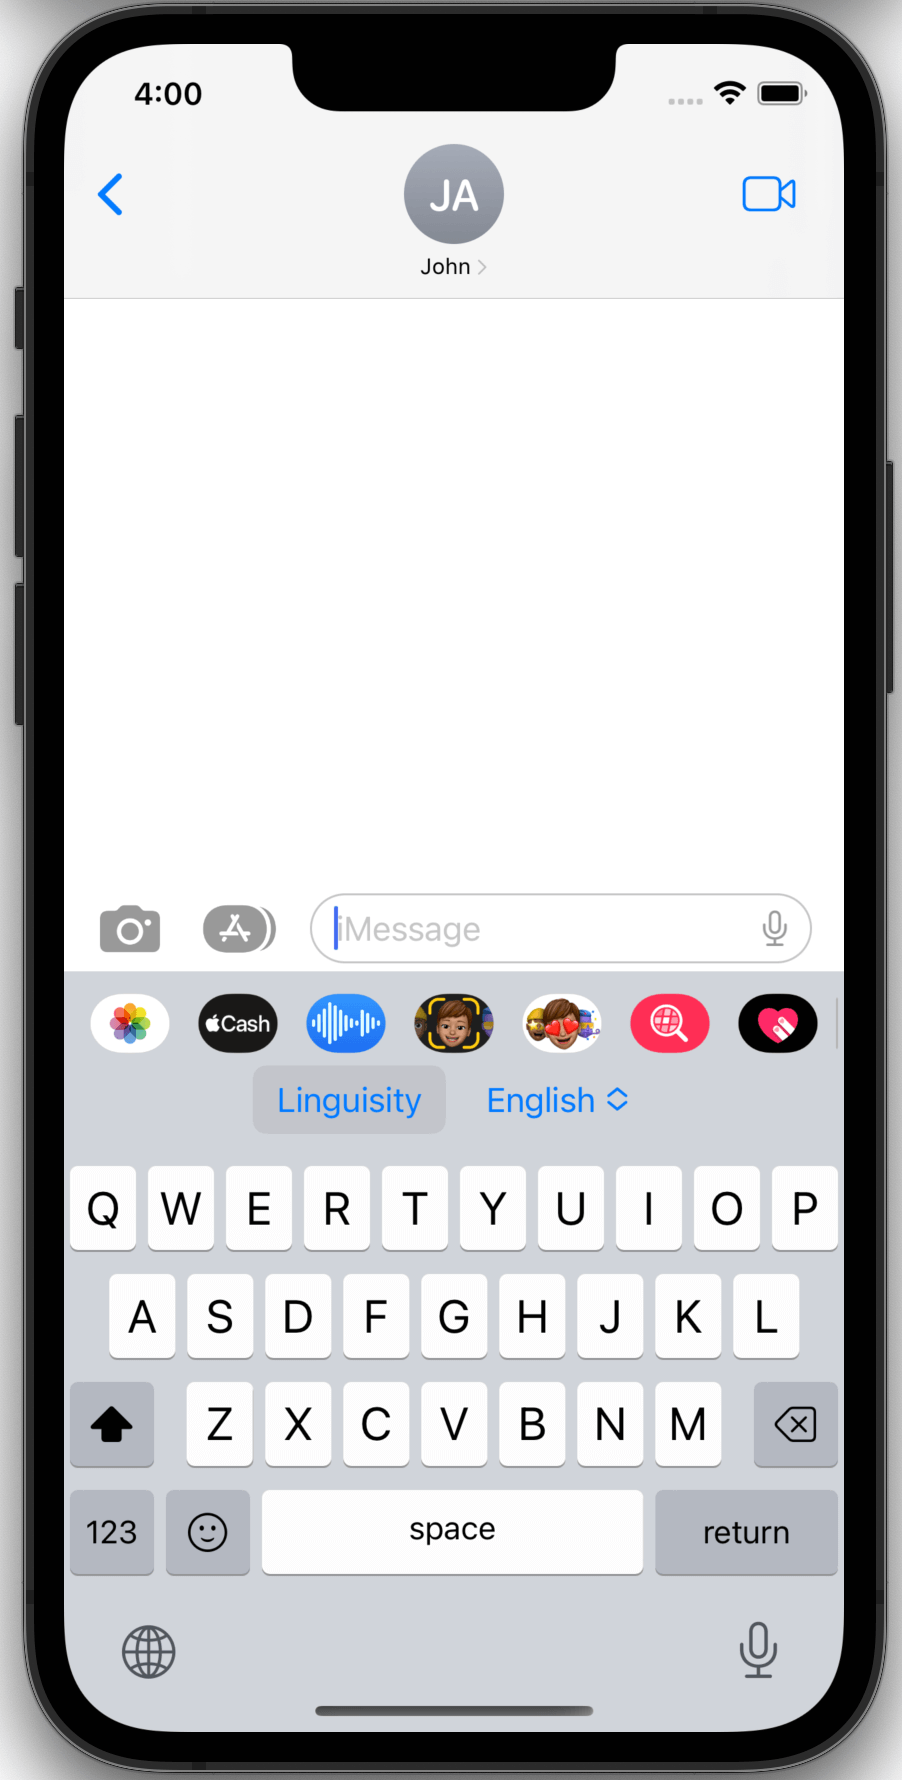
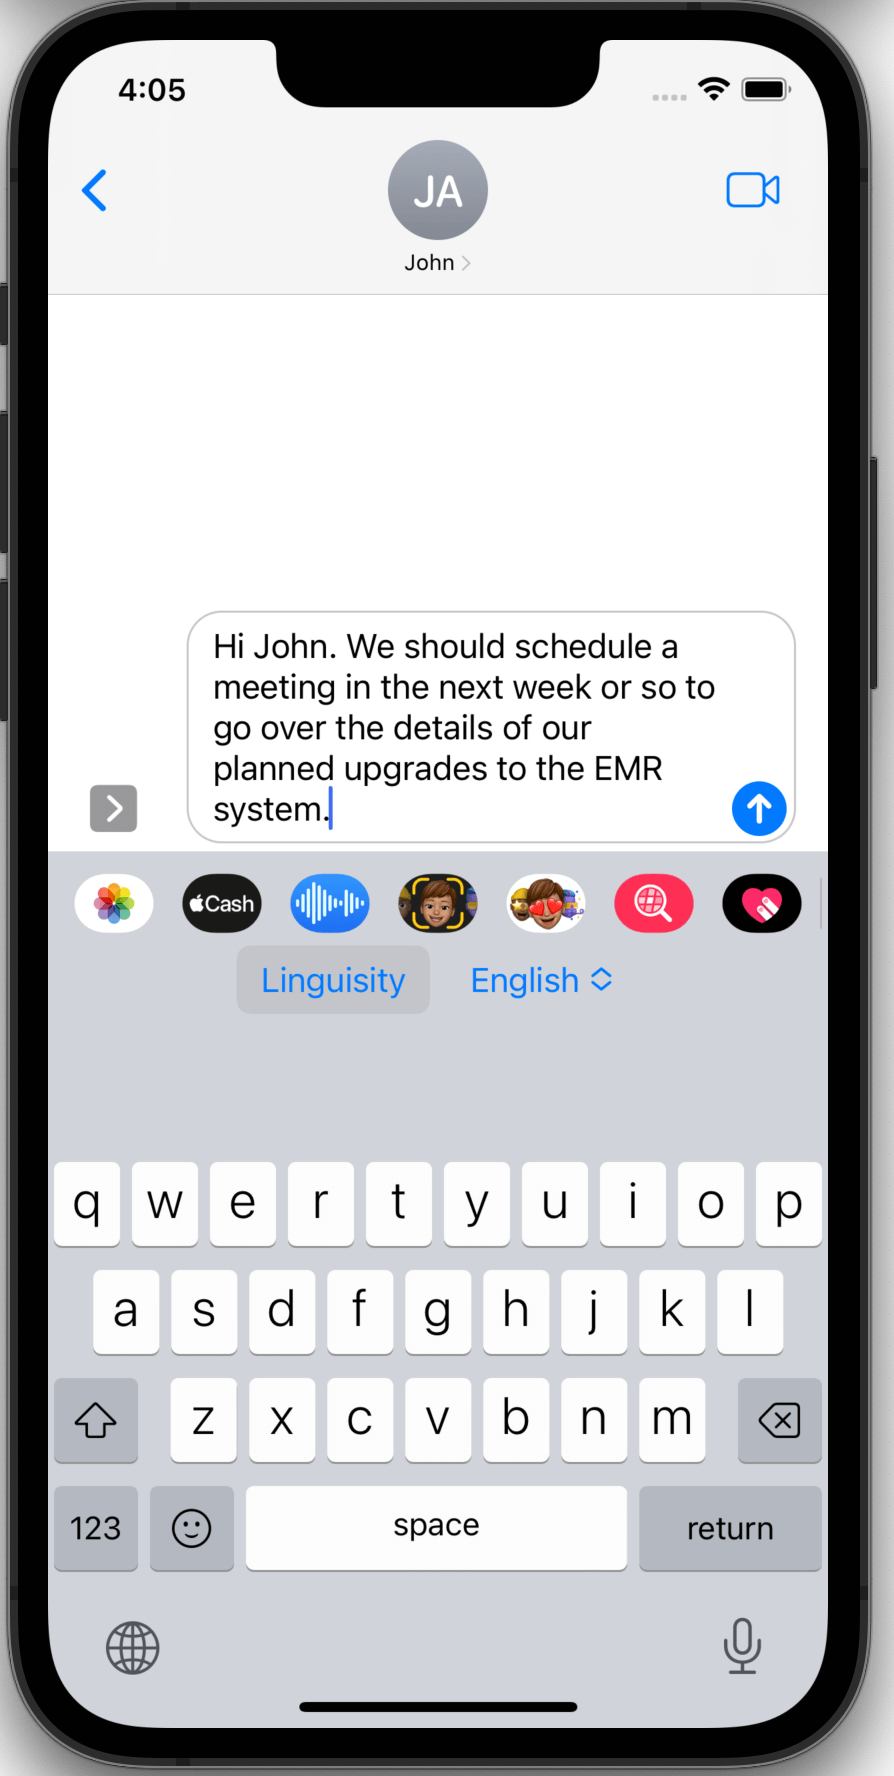
You will know that the Linguisity keyboard is active when you see the Linguisity button and a target language selection box in the toolbar above the keys.
Step 17
Type a message that you would like corrected and enhanced and then click the Linguisity button
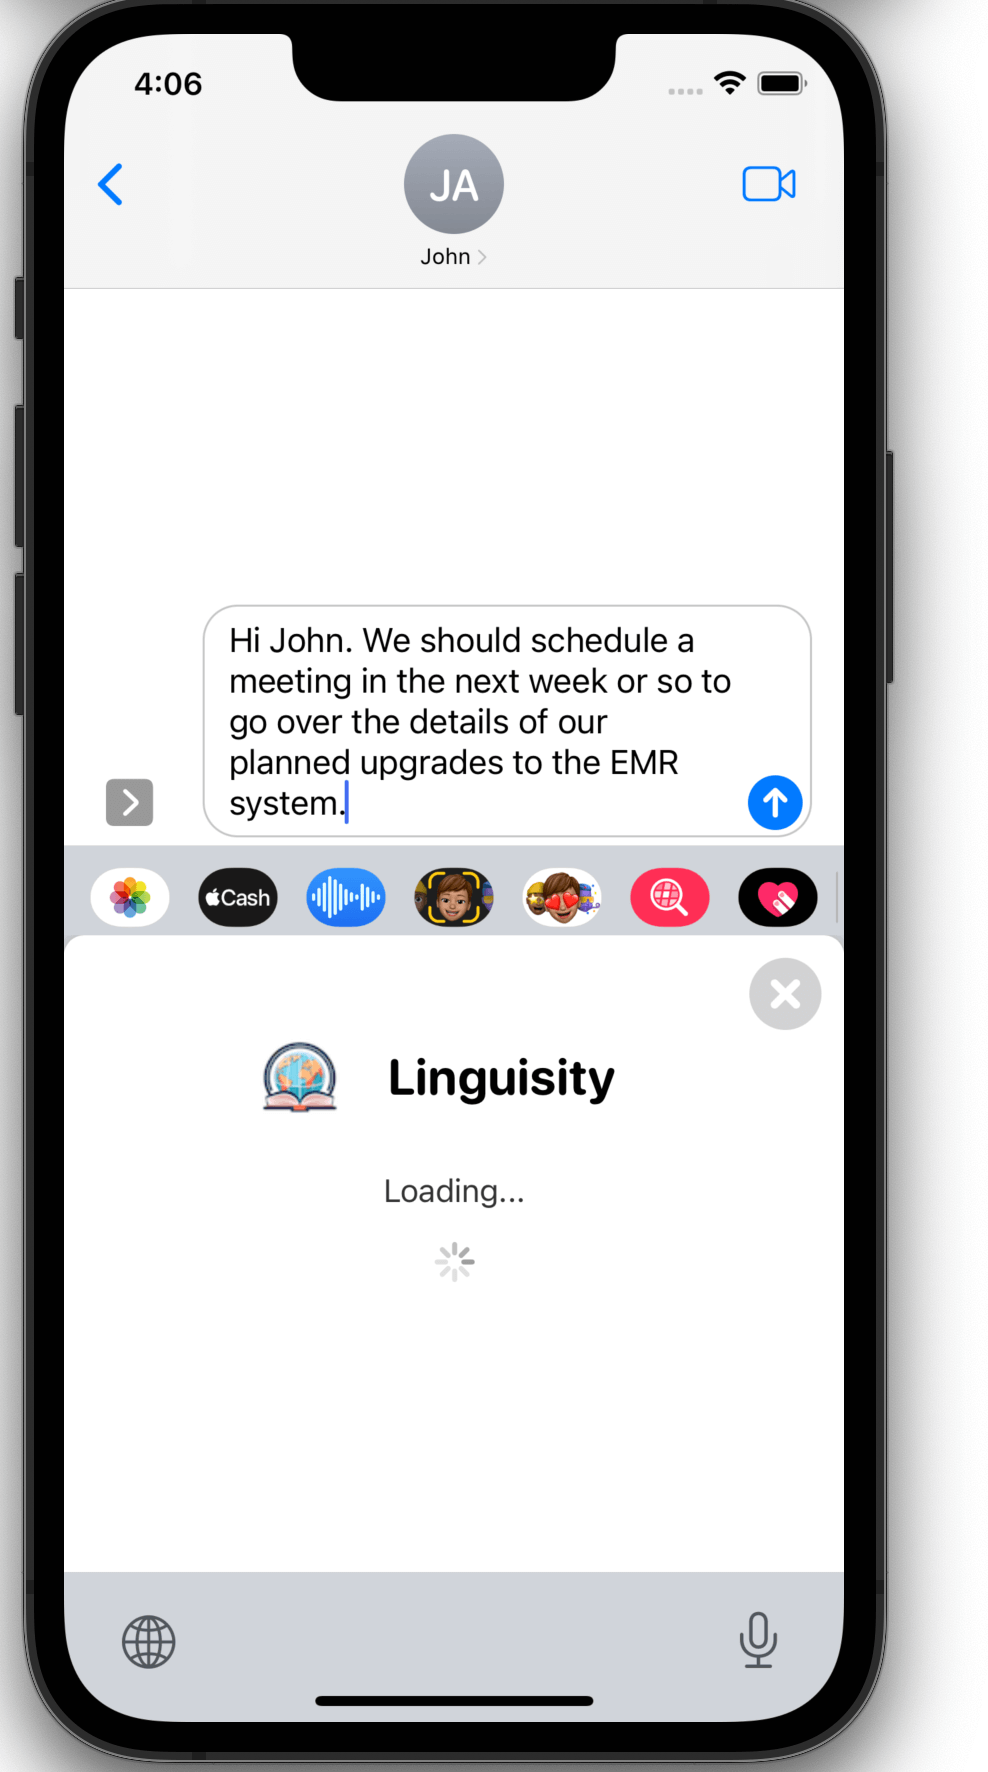
Step 18
The text will now be sent to our AI models for correction and enhancement while the loading screen is displayed.
Step 19
Once completed, the revised version will be displayed. If you are satisfied with the outcome, click Apply to replace your text with the improved version. If you prefer not to apply the changes, click the X in the top right corner of the popup window to close it.
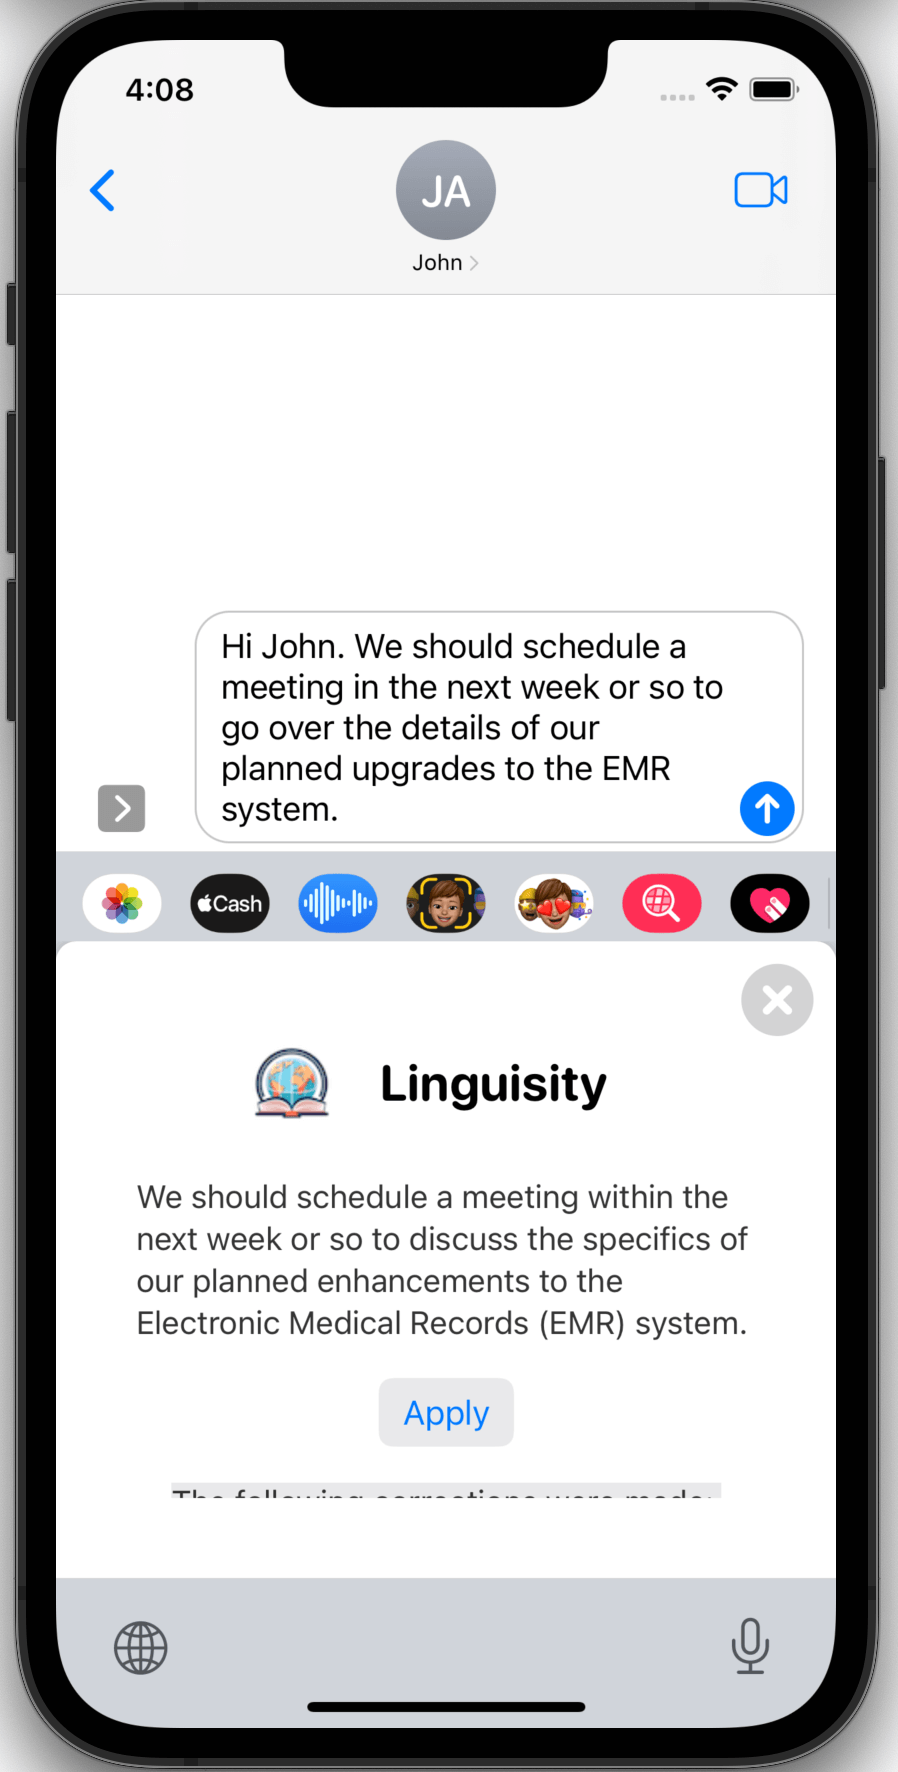
Step 20
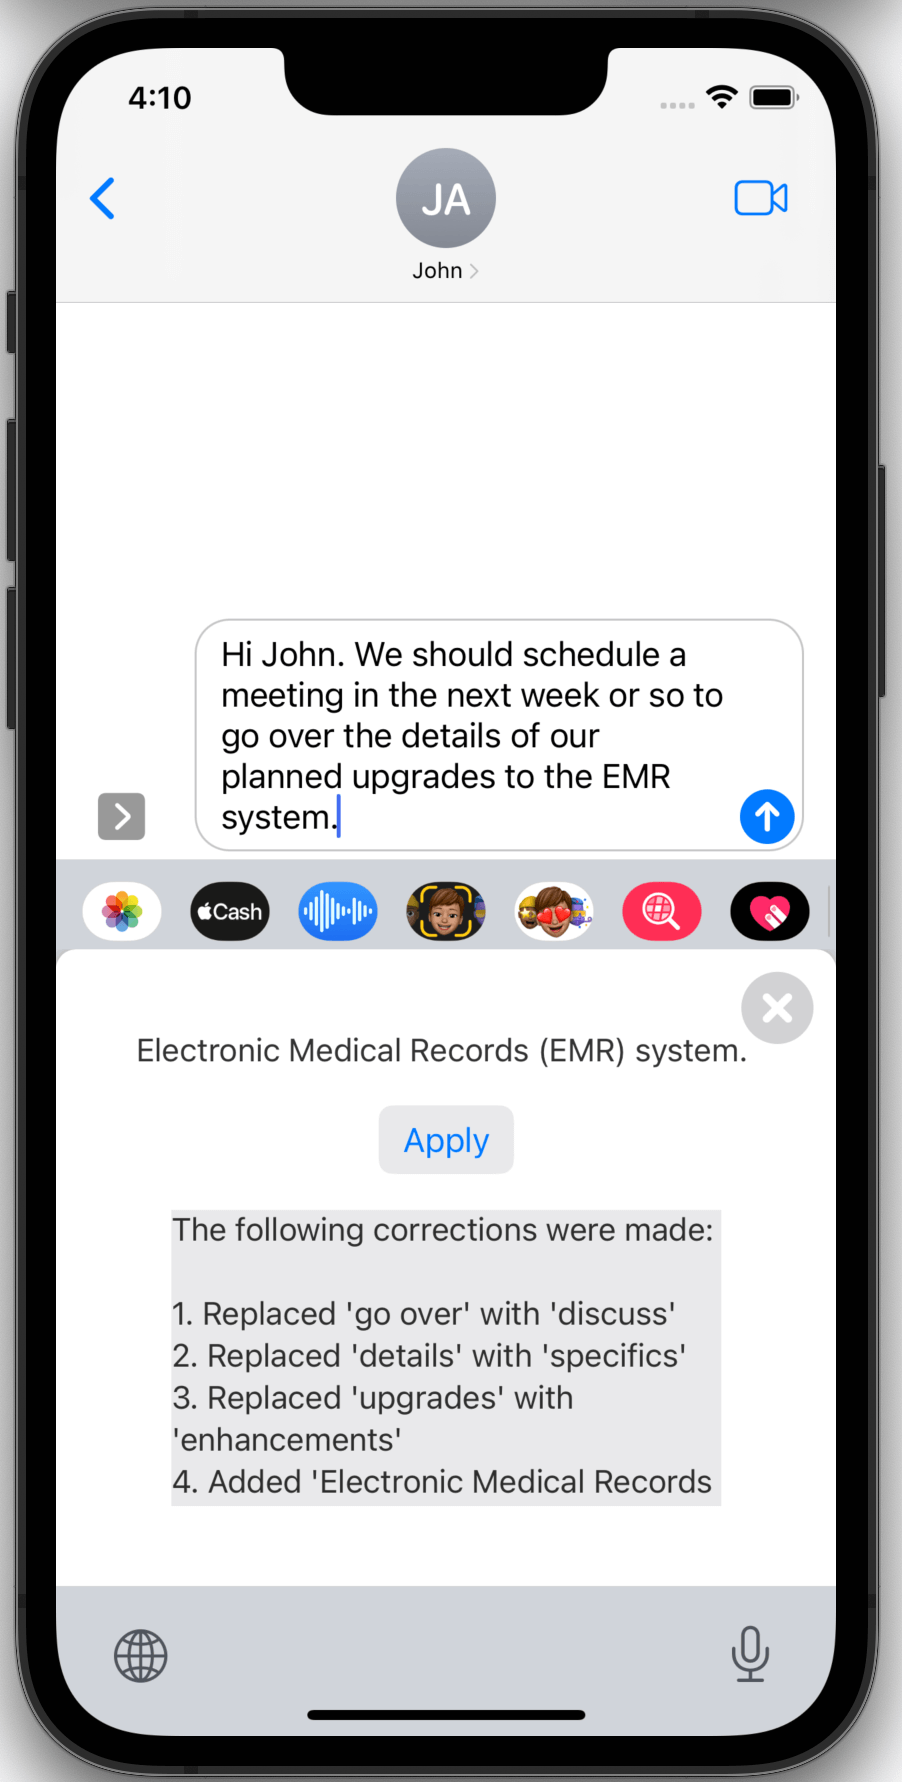
Before clicking 'apply', you can also scroll the window within the popup to view the details regarding the modifications made to the original text.
Step 21
Once applied, you will notice that the text input in the application you are working with has been updated with the corrected and enhanced version of your text. From now on, you will be able to use Linguisity wherever you require it within iOS!